

Introducing Spike: Getting Started With Conversational E-mail For Android


Describing itself as “the world’s first conversational e-mail client”, Spike is a secure email application that completely changes the way we interact with emails, organizing them into simple and easy-to-find threads organized by the sender (like chat conversations in modern instant messaging apps); saving you the stress and time of navigating through an endless clutter.
In addition, Spike also brings essential work tools like notes and tasks and other useful features like voice calls and groups. With Spike, you don’t have to register for something new, you only need to link your existing email account - and it auto-sorts your inbox!
This guide will help you get started with Spike for Android; providing you with a step-by-step approach to setting up your account, sending messages, linking other emails, managing Spike’s productivity tools, as well as navigating other cool features. Whether you're an expert or not, Spike offers an entirely fresh perspective on email management that can transform the way you work and communicate.
Getting Started
Downloading and Installing Spike on Android
You can download and install Spike from Google Play Store, using the following steps:
- Open the Google Play Store app on your Android device and search for "Spike Email" or "Spike Mail" in the search bar.

Once the app pops up, tap the "Install" button and wait for the app to download and install on your device

Setting Up Spike
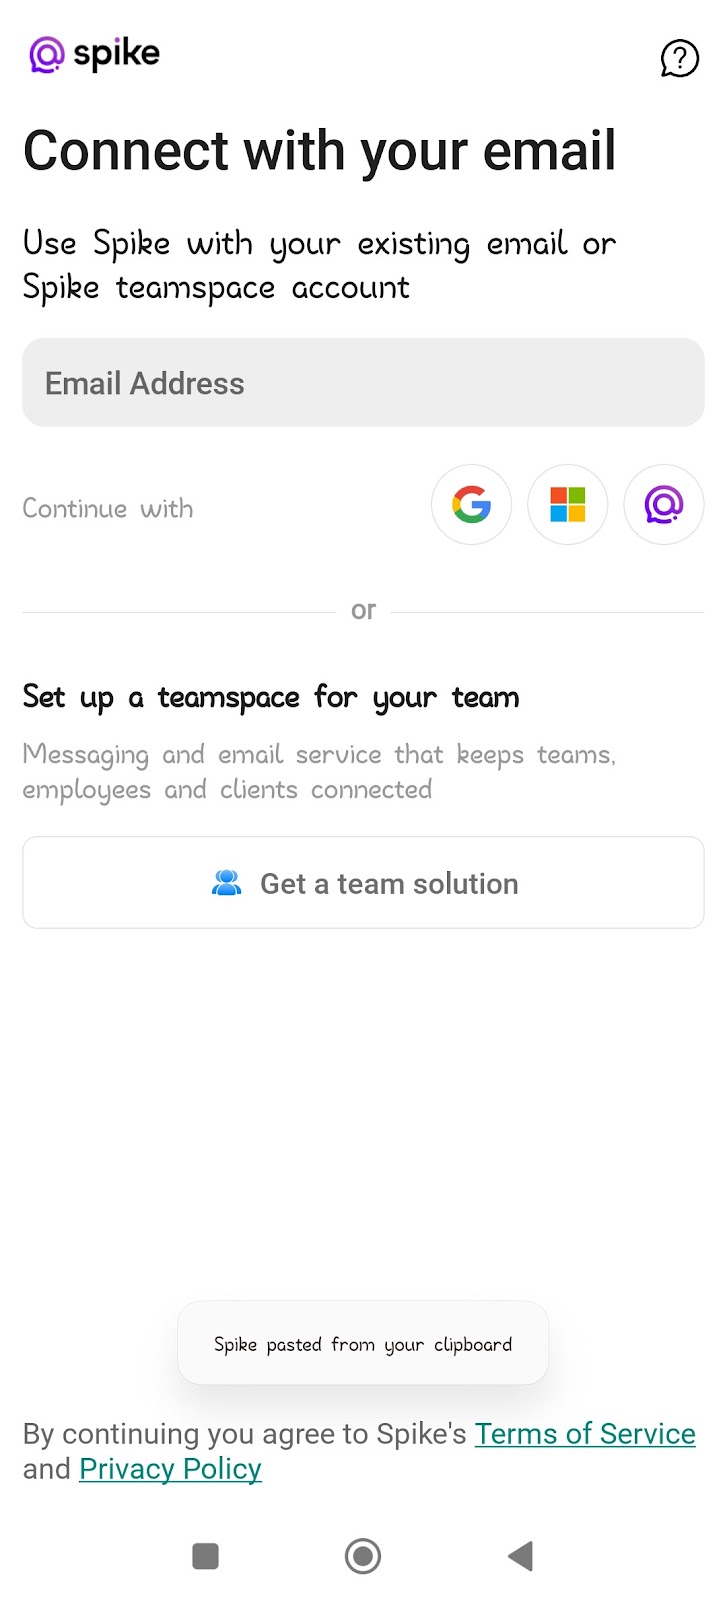
On the first launch, Spike notifies you that you can use the app with your existing email, create a Spike account, or set up a Spike teamspace. Spike supports various types of email clients and also gives easy options if you want to set up using your Google or Microsoft account. Feel free to set up your e-mail in the following steps:
- First, enter your email in the ‘email address’ box, or tap on your provider of choice.
- Once that is done, the app will request to connect to your email client, to gain permission to manage your emails, calendar, and contacts from the app.
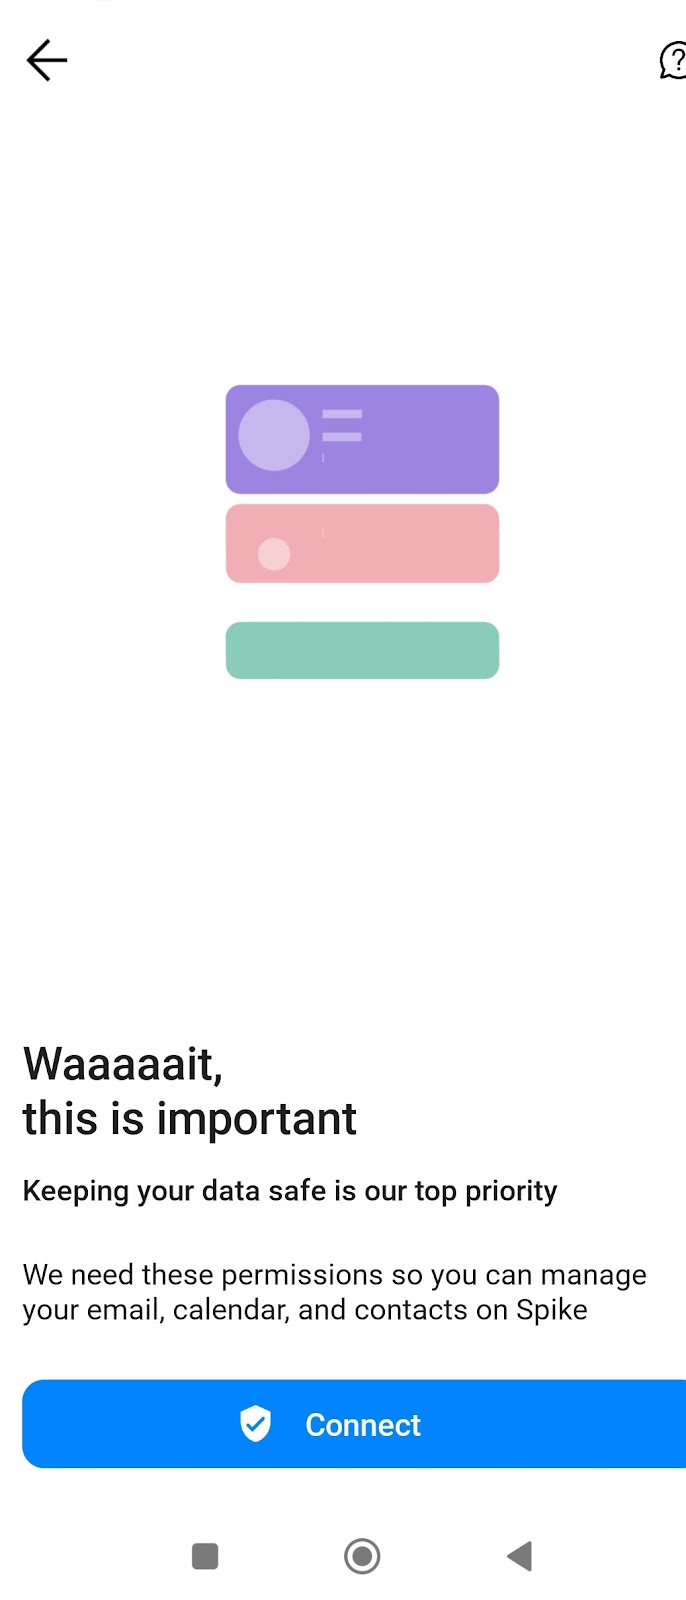
- Tap ‘Connect’. It leads to a webpage by your email provider to confirm. Tap on Continue.
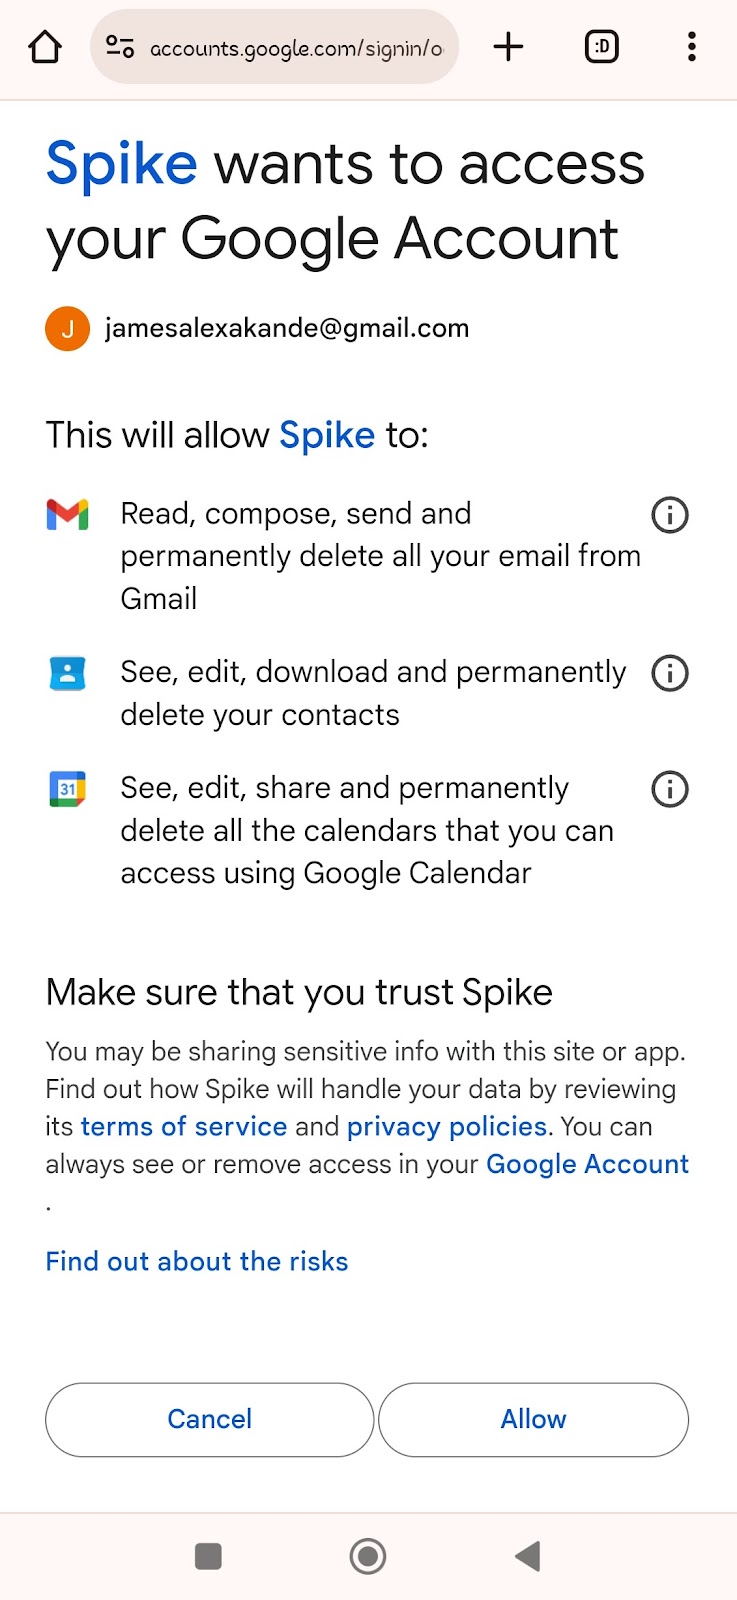
A permissions screen from your email provider will appear, and you will be required to tap Allow to confirm.
Congratulations – you’re all set!
Navigating the Interface
Home Screen
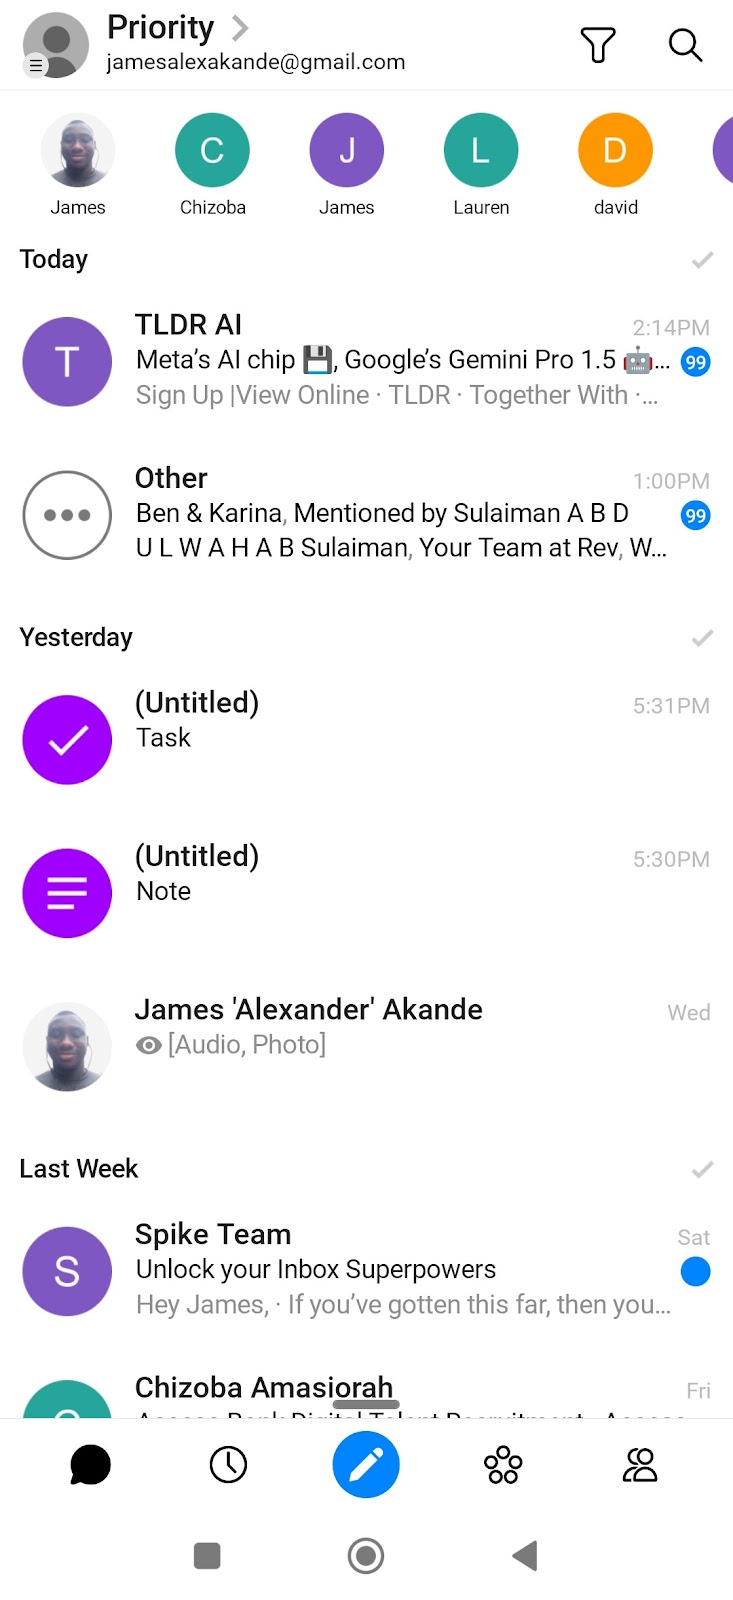
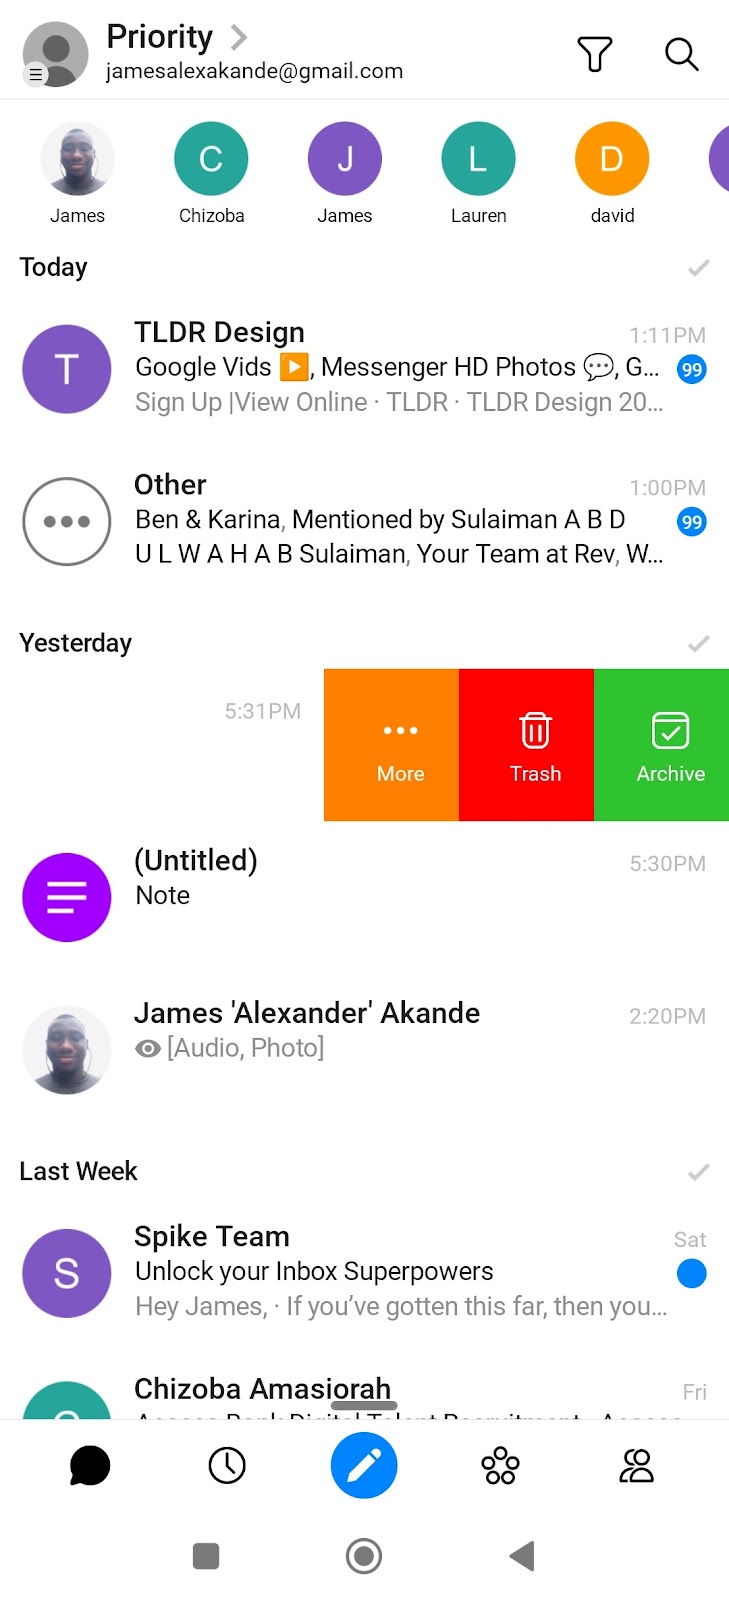
Spike’s home screen looks something like this:
Your emails are auto-arranged and split into two feeds – Priority and Other. The ‘Priority’ shows important messages you receive, while Other refers to non-priority messages like social media notifications and promo offers.
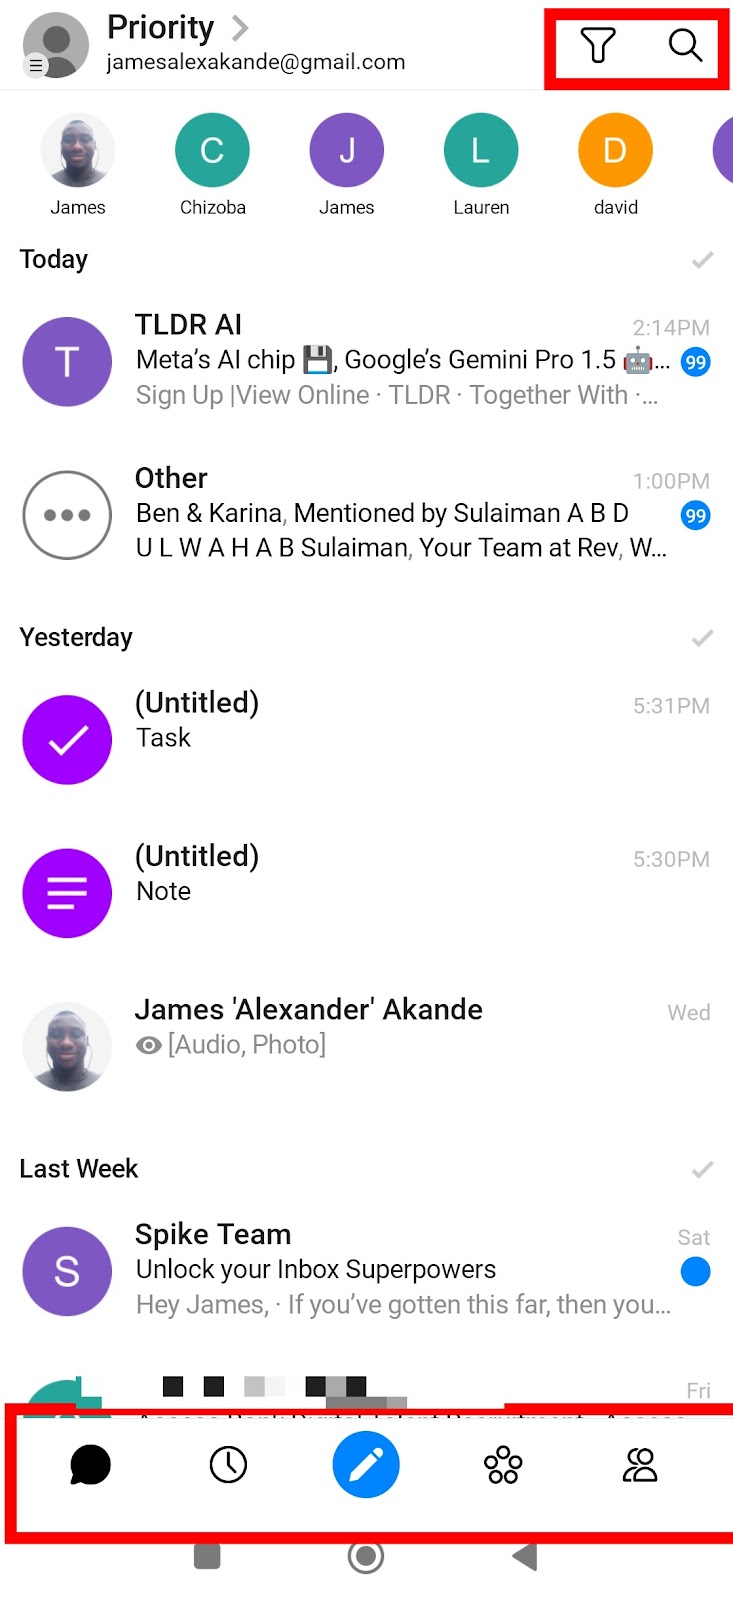
The filter icon on the top right helps you filter between read and unread messages.
The search icon allows you to search for people, messages, or files. In the free plan, you can only see results within a 60-day window.
The chat icon in the bottom menu shows your inbox with a subfolder called ‘Other’, to allow for non-priority messages, which you can easily reclassify.
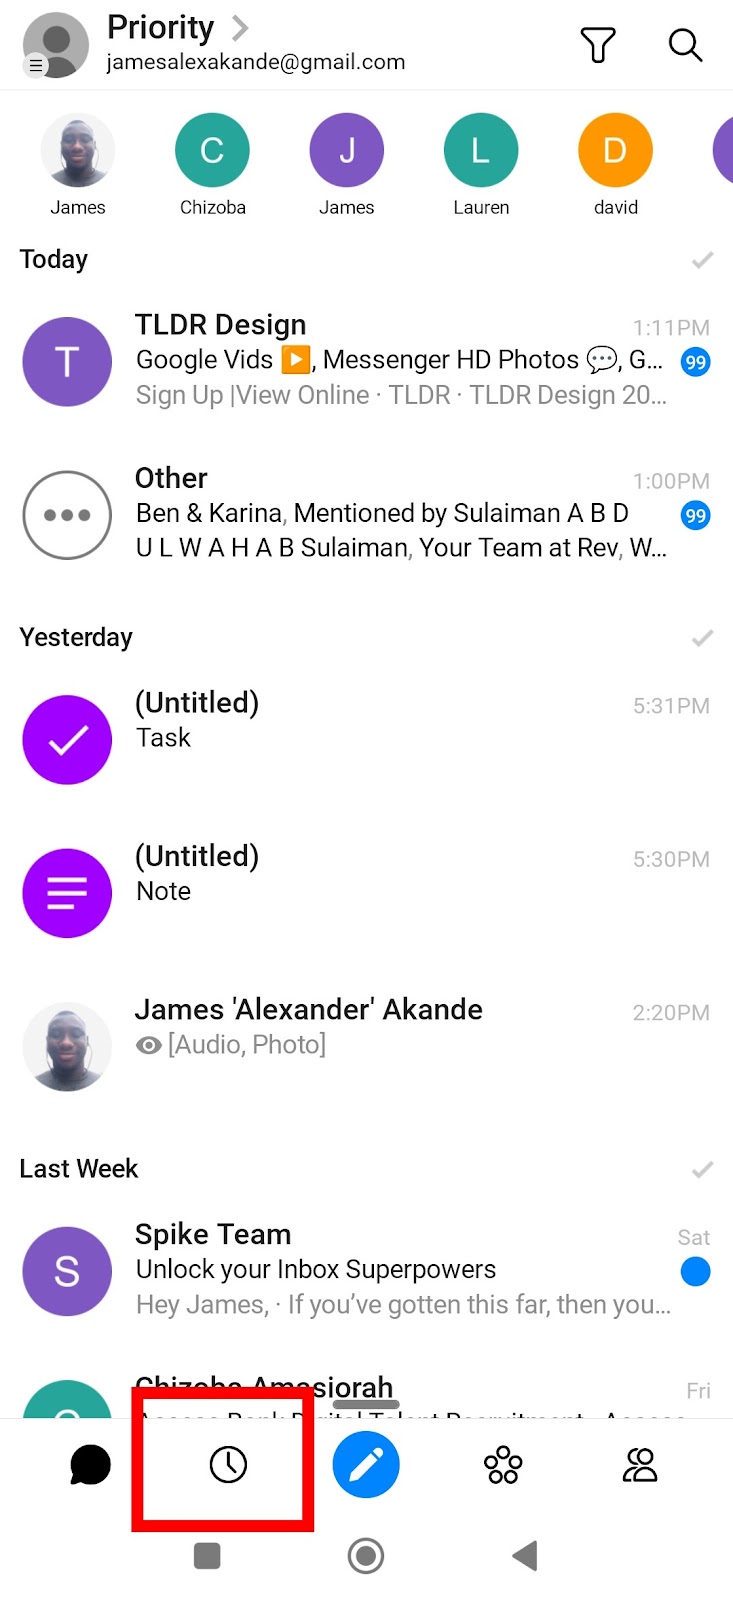
The clock icon beside the chat icon shows a unified calendar for all the accounts registered with Spike. Near the clock, the plus icon allows you to create a new calendar event.
The blue pencil icon in the middle of the bottom menu allows you to compose and send an email, just like in traditional email applications.
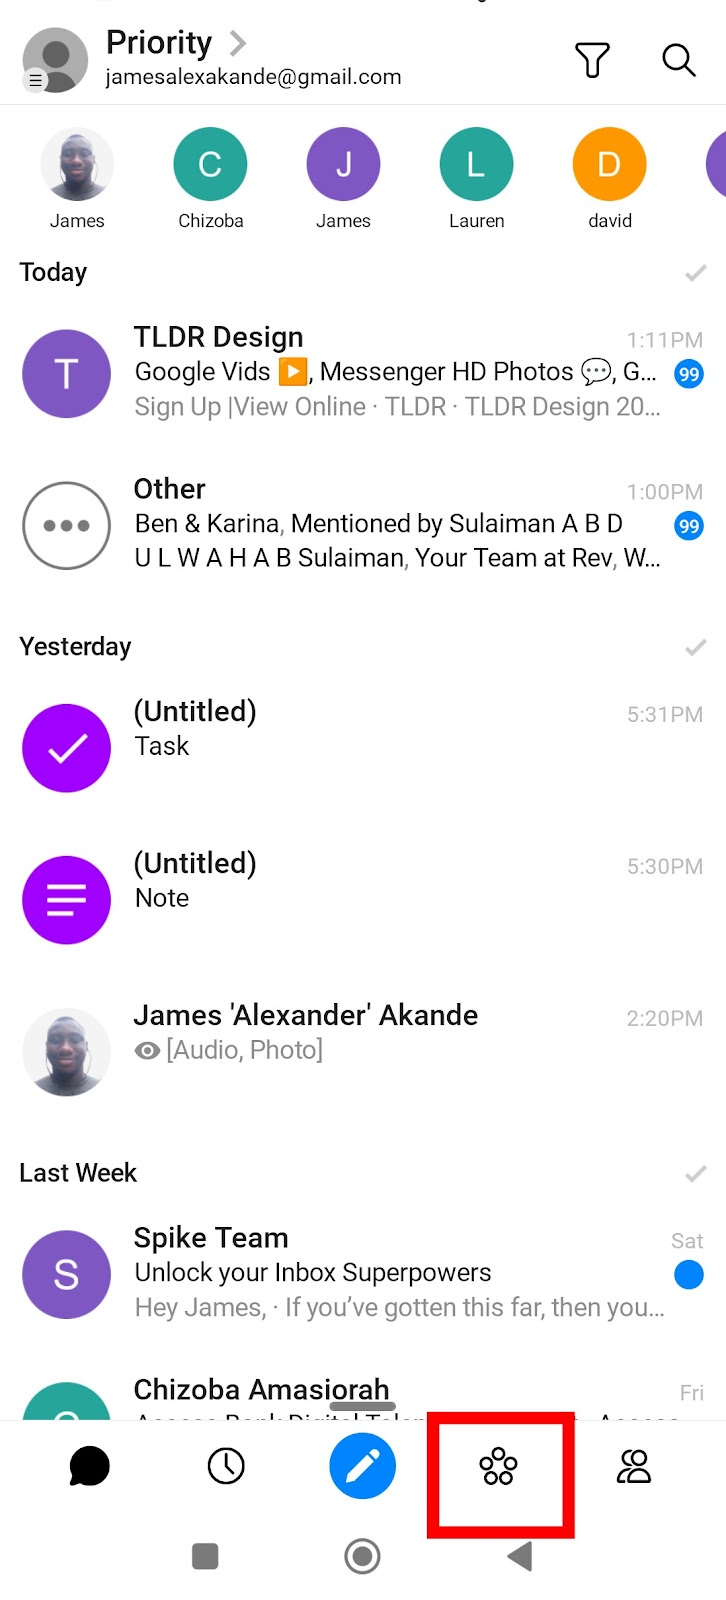
The Groups icon gives options for creating Spike groups – functioning similarly to group chats on instant messaging apps.
The people/contacts icon displays your email contacts. However, just like Search, it only displays contacts within a 60-day window if you are using Spike’s free plan.
Sidebar
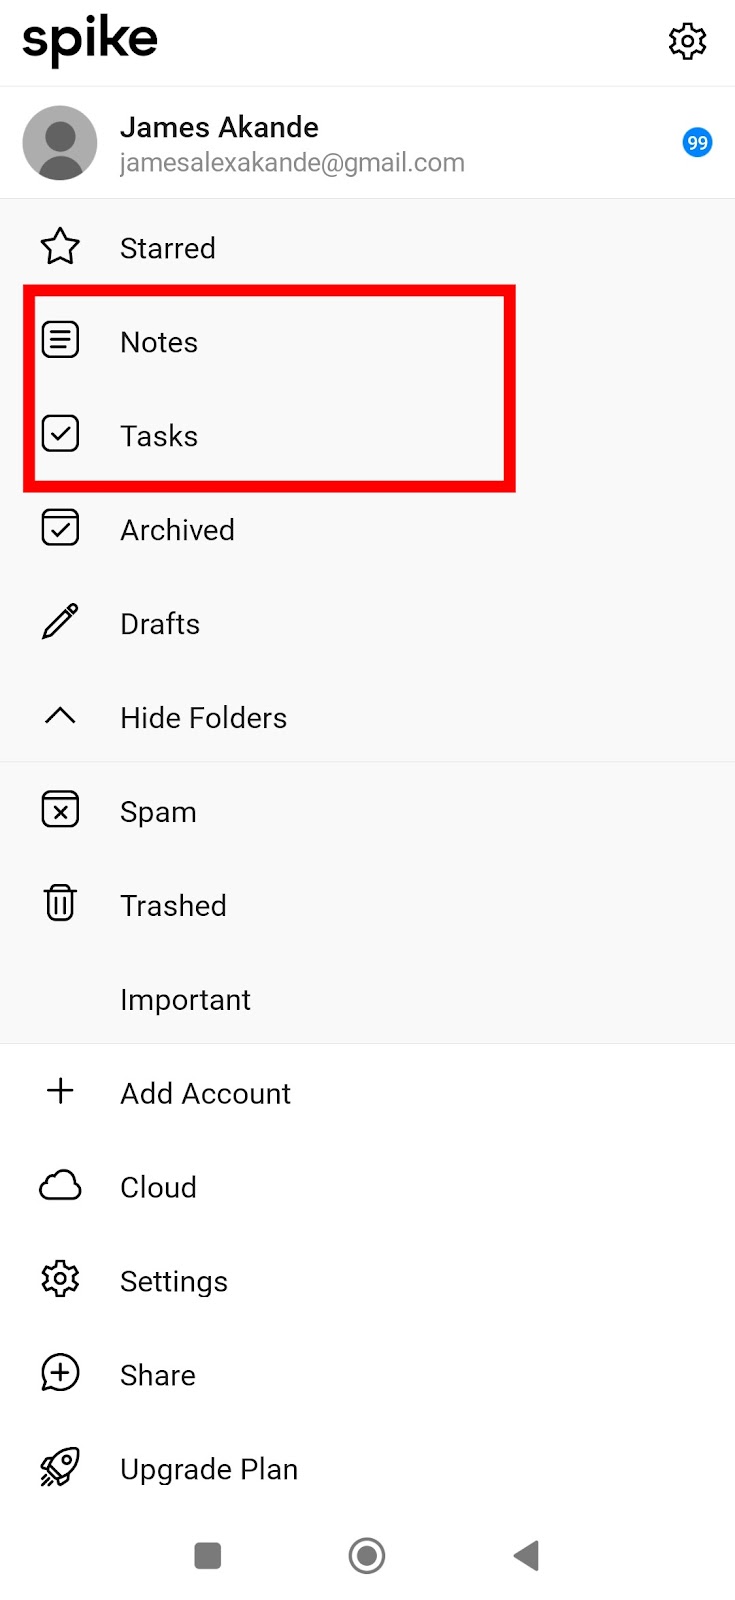
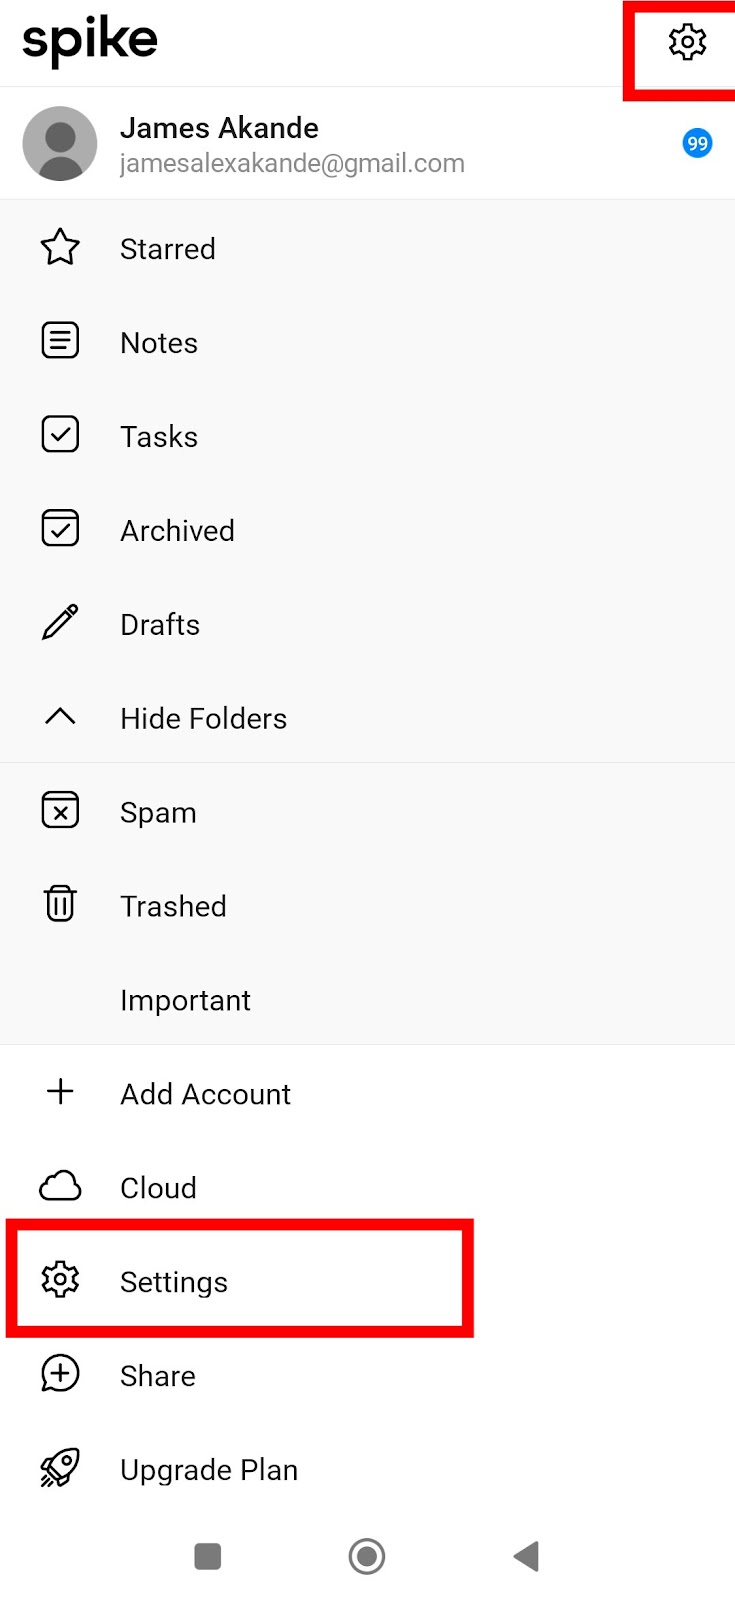
In Spike, the sidebar panel is an easy way to access traditional email features like Starred Mail, Drafts, Spam and Trashed, unique ones like Notes and Tasks; and other as well as other actions like Settings Help and Upgrade Plan.
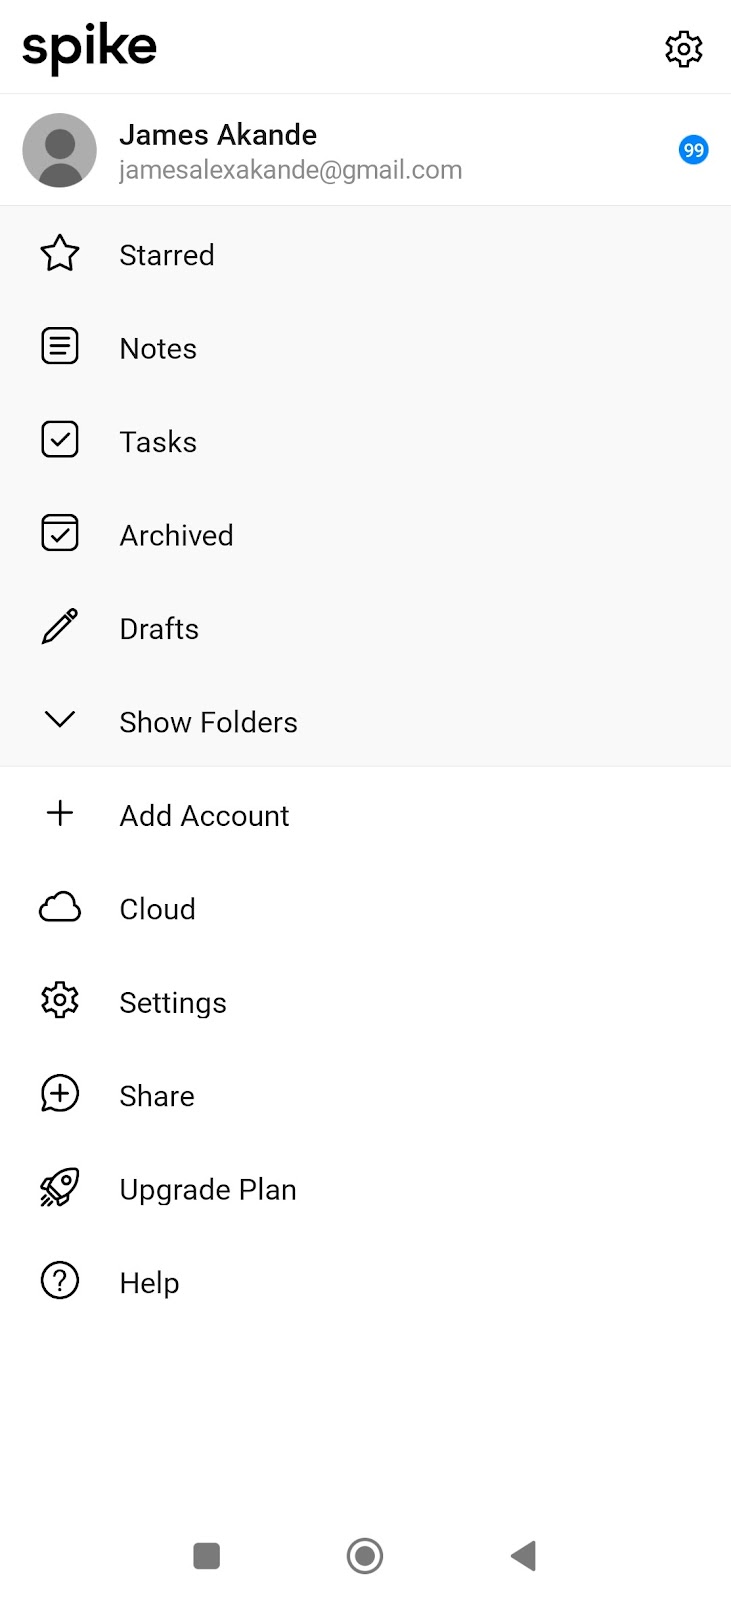
You can easily access the sidebar by swiping right on the home screen of the Spike app.
Using Spike
Sending Messages
To compose a new message, simply tap the blue pencil icon in the bottom menu (see Navigating The Interface section) to open the message composer.
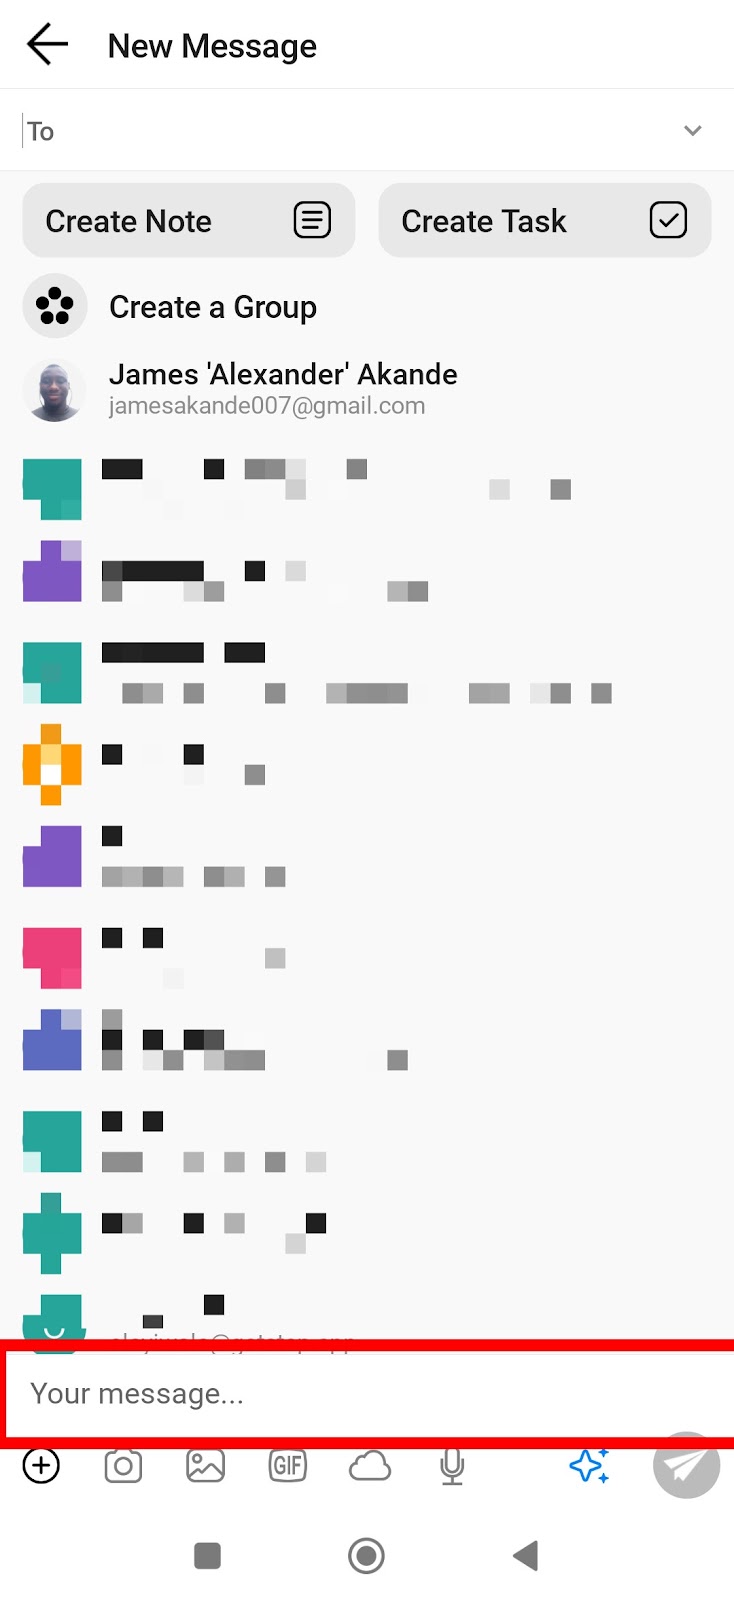
In the composer, select a recipient from the list of email addresses on the screen, or enter a new one by tapping the ‘Your Message’ box at the bottom of the screen.
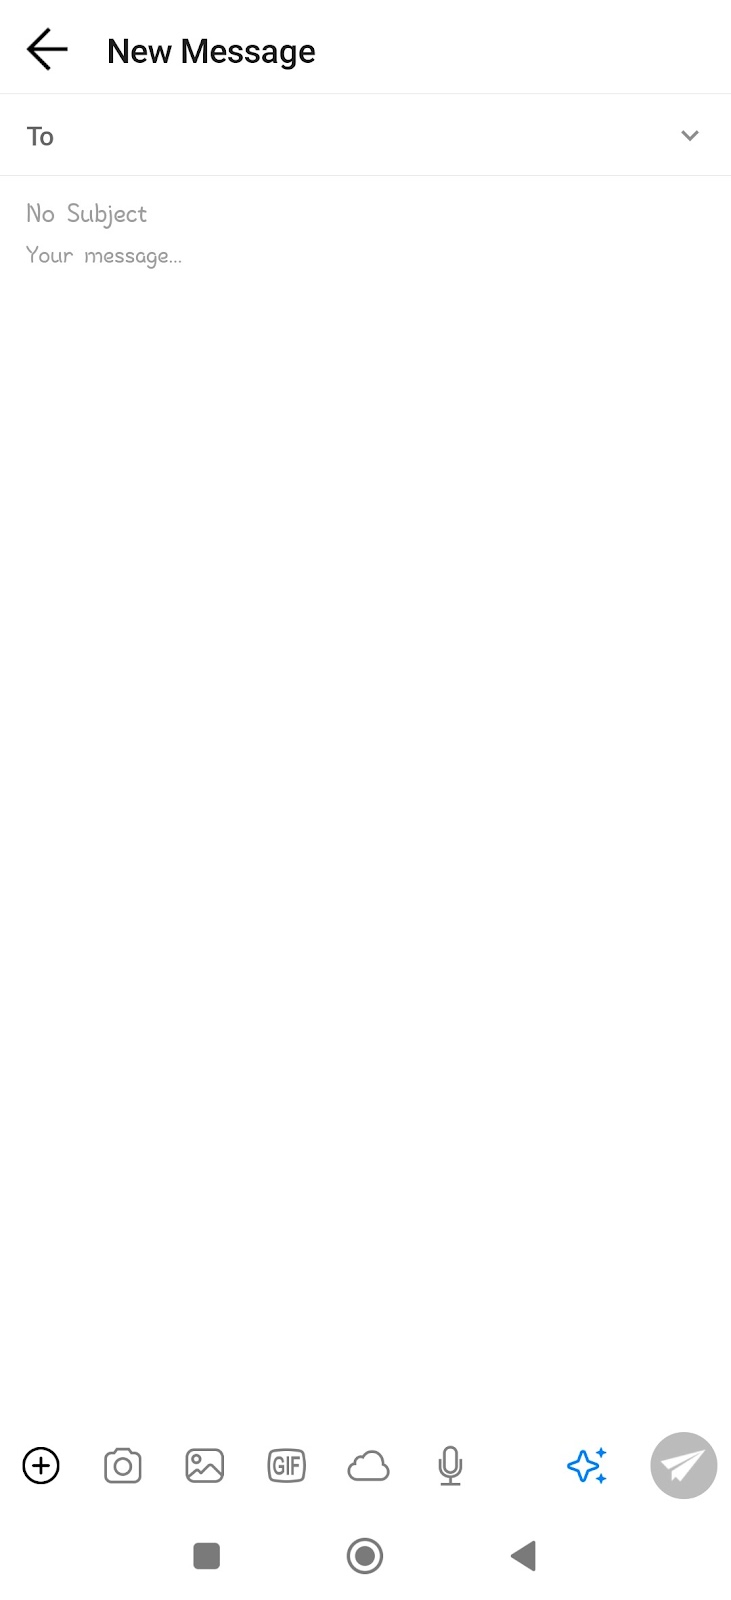
Tapping it expands into a new screen where you can type out several details including:
· email recipients
· a subject line (optional)
· the message body
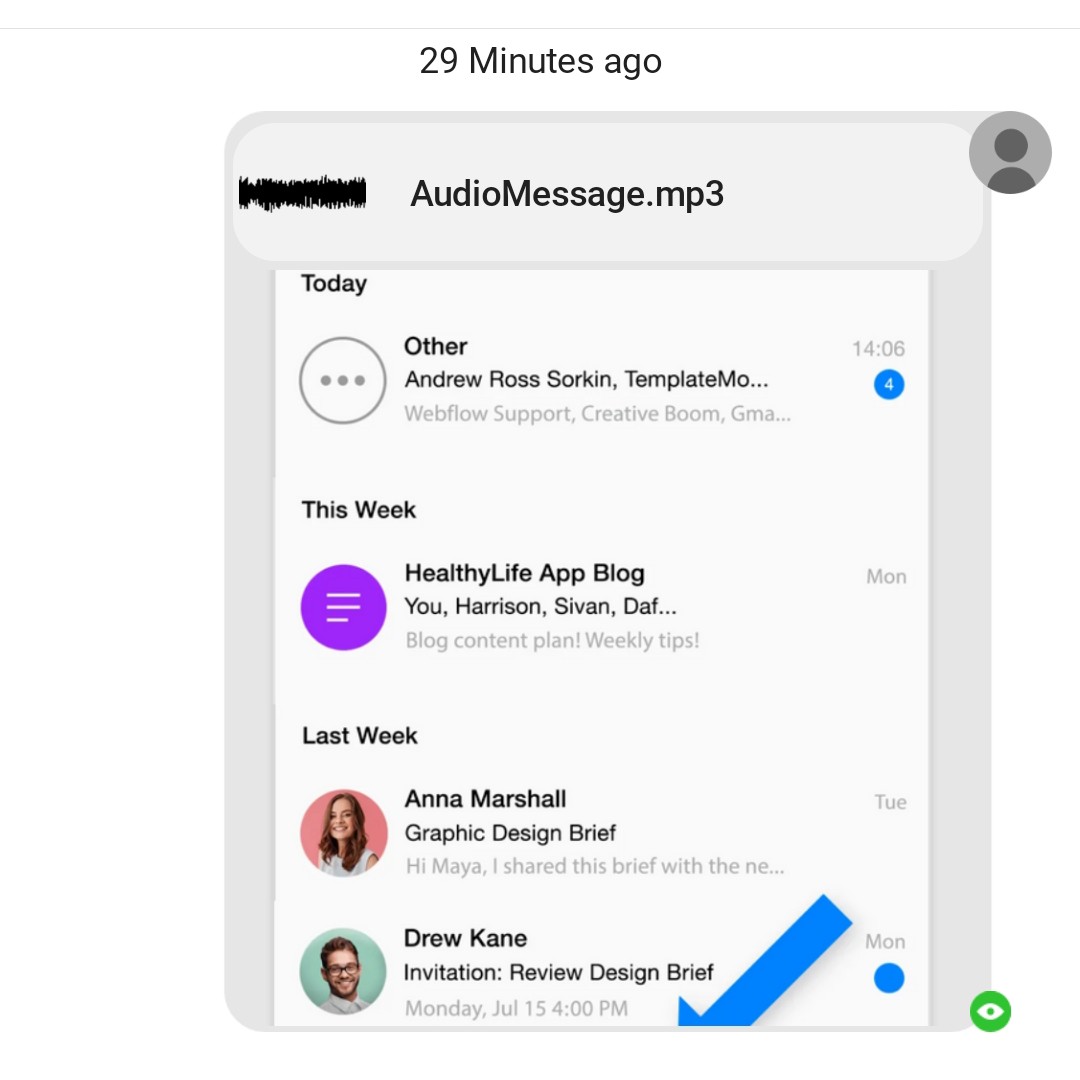
In addition to this, Spike also allows you to easily send voice notes to any email (a unique feature), GIFs, images, instant captures, attachments, video calls, and more – simply by using the bottom toolbar.
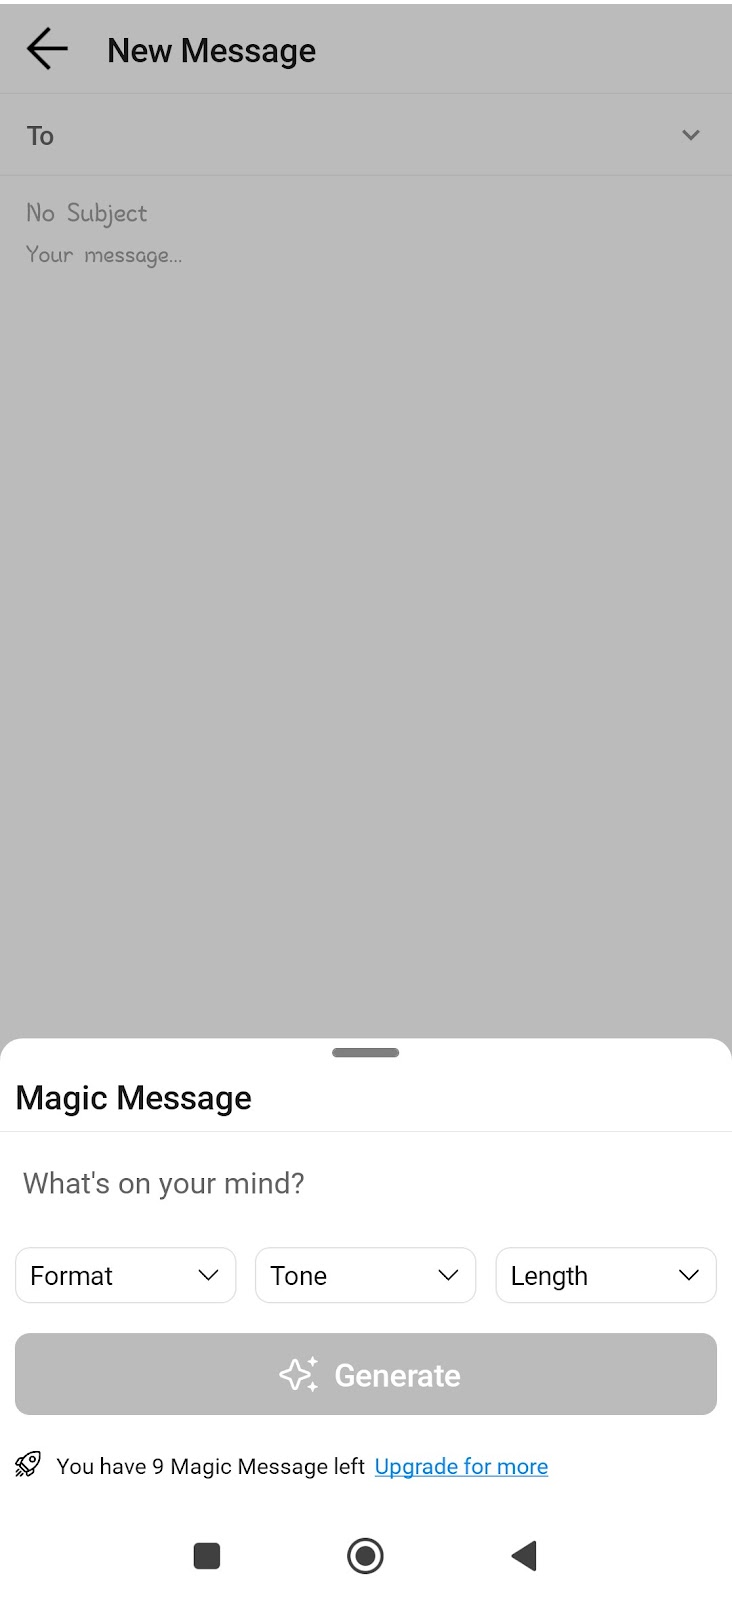
Magic Message
Spike also provides Magic Message, an AI-integrated feature which allows you to generate an email by specifying a format, tone, and message length. You can find the Magic Message icon on the right-hand side of the toolbar.
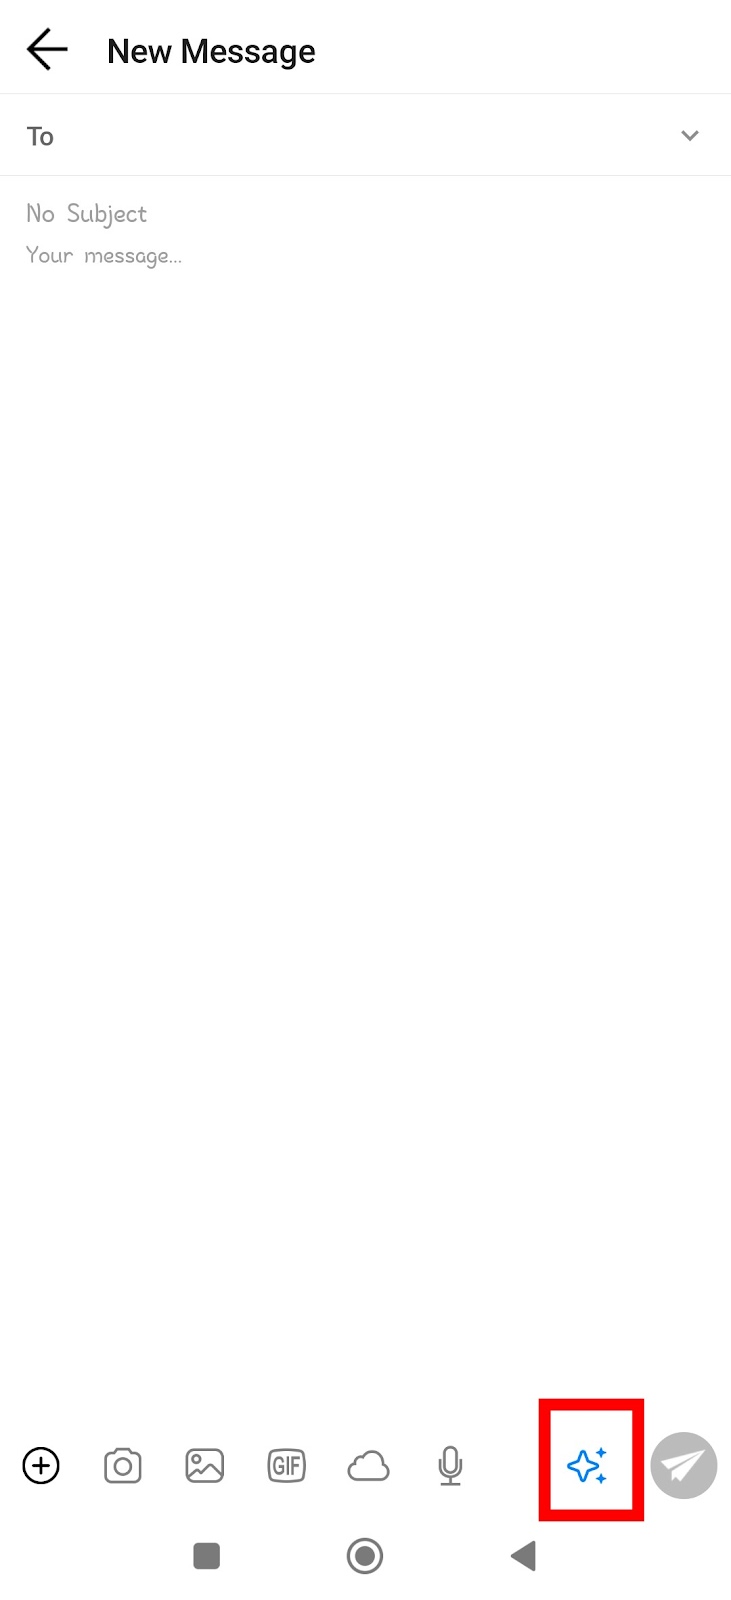
You can use the Magic Message feature ten times on the free plan, and upgrade to the paid plan for more access.
Chat Icons
With Spike, you can easily know if your message has been read or not. Just like chats, Spike’s interface comes with indicators for each message you send – so you can easily know if your recipient has read your email or not.
The green tick indicator means your message was sent.
The green eye indicator means the message has been seen by the recipient.
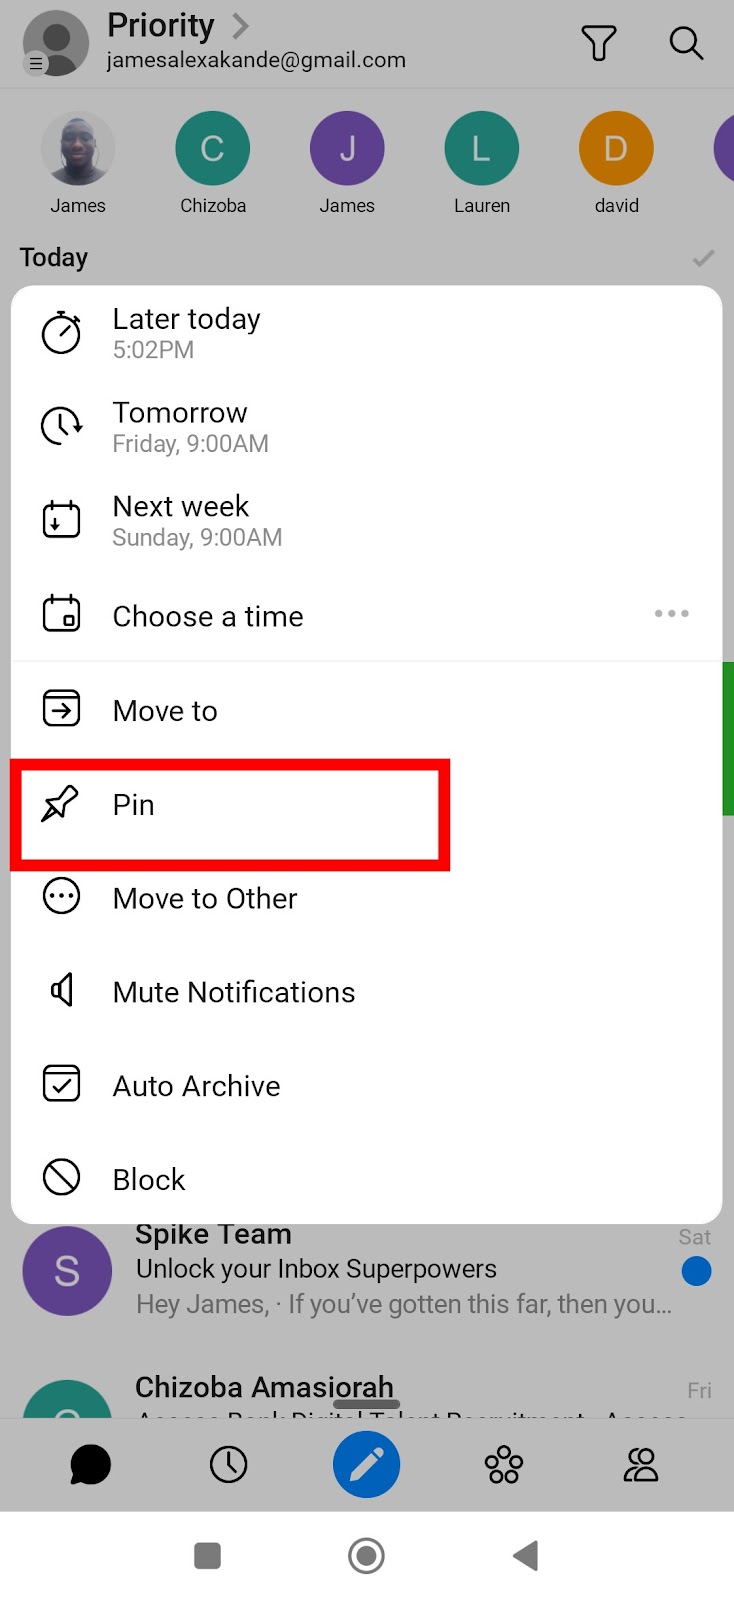
Pinning Messages
Spike allows you to pin a message, a note, or a task to the top of your inbox to ensure easy accessibility. It helps you quickly see older but important notes, tasks and message threads without having to look for them
· Swipe left on the message, task, or note to reveal the More option.
· Tap on the Pin icon,
Conversation Modes in Spike
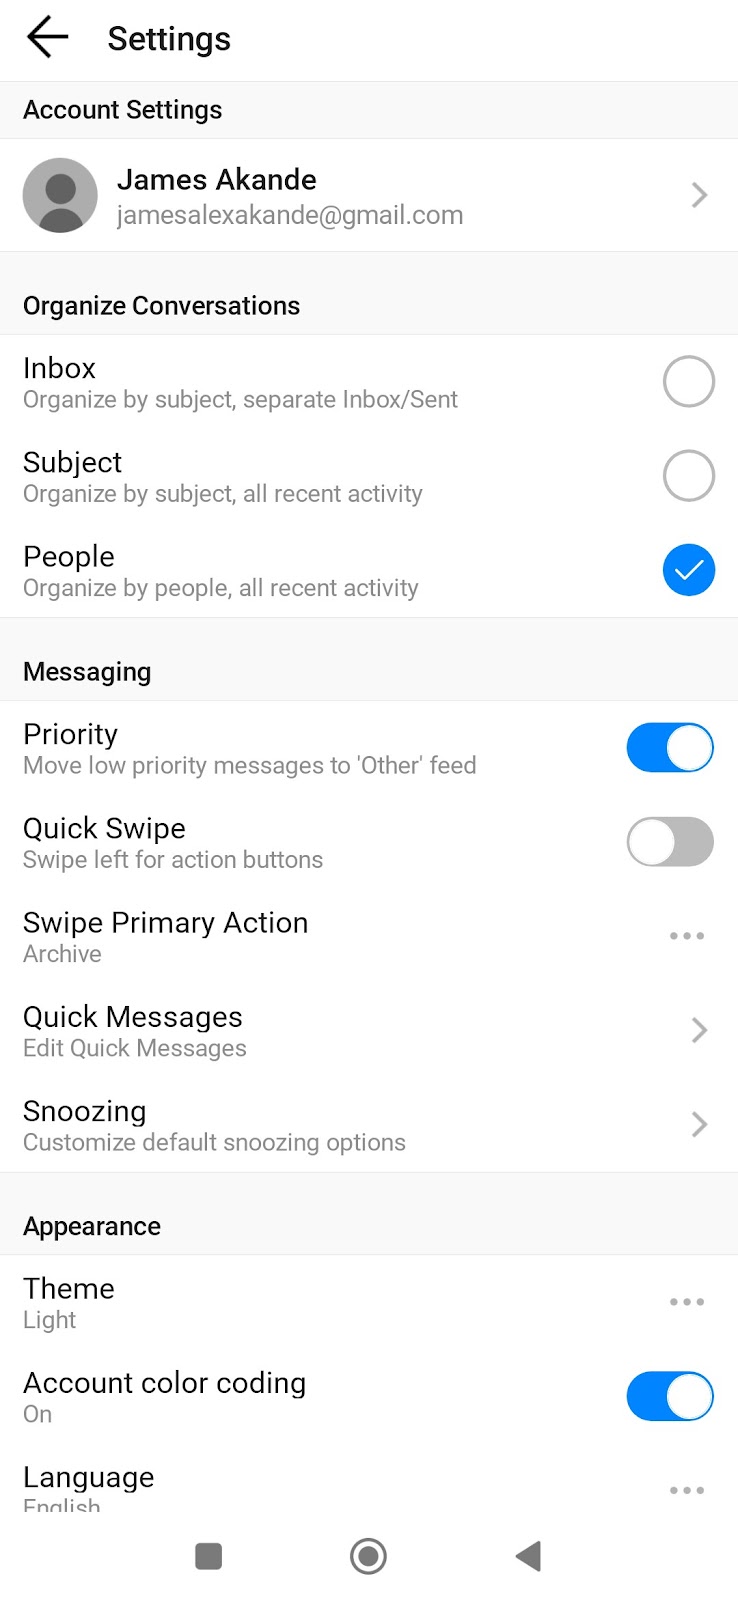
Spike offers three conversational modes; accessible via the Settings section:
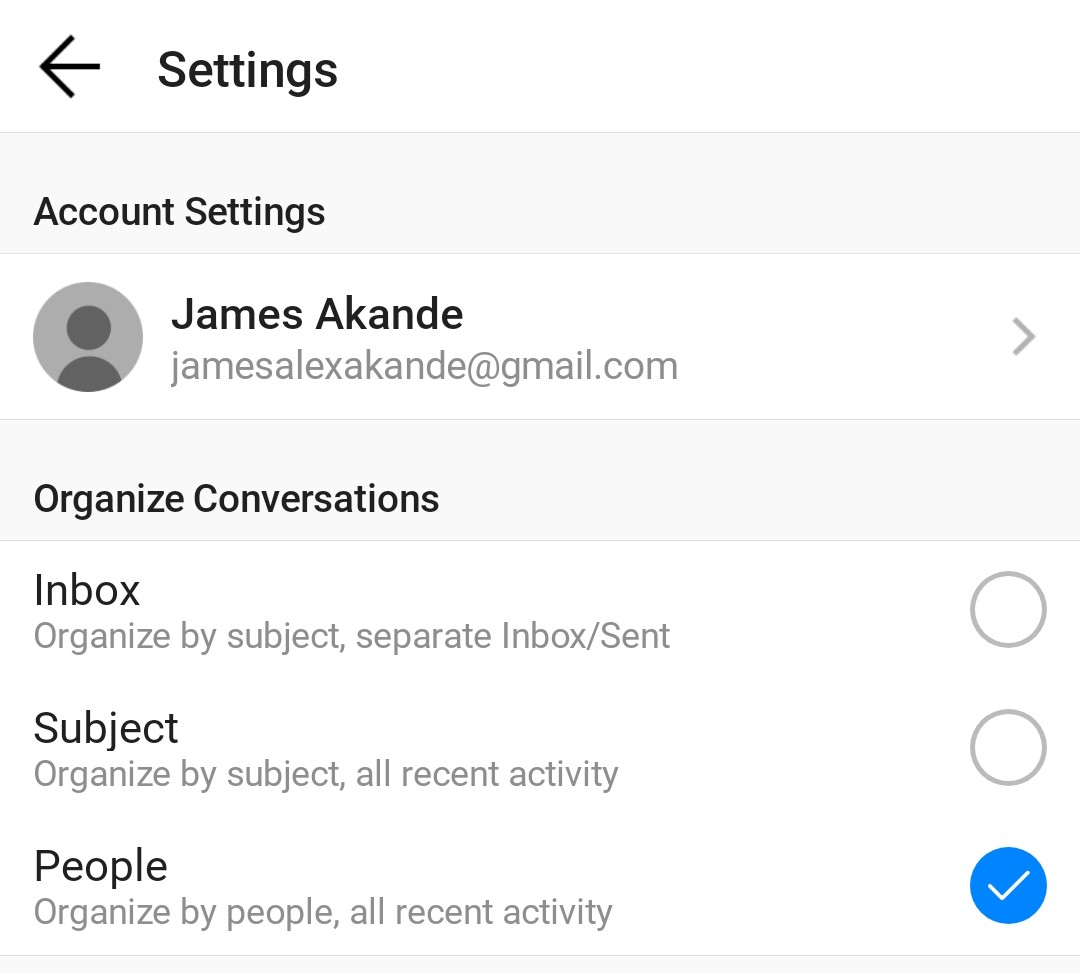
People Mode, which organizes your emails by contact/sender. I highly recommend this method as it reduces the messiness and stress associated with traditional e-mail arrangement
Inbox Mode, which mimics traditional email messaging
Subject Mode, which organizes each thread by subject line.
To toggle between these modes, you can go to Settings, accessible via the sidebar.
Groups
Spike supports group creation - a feature which acts as a collaborative workspace for teams; and changes complicated email chains between team members into conversational form. Anyone can join a Spike group – no matter your email client.
To create a group on Spike app for mobile:
· Click on the blue pencil icon to open the message composer, and click on Create Group
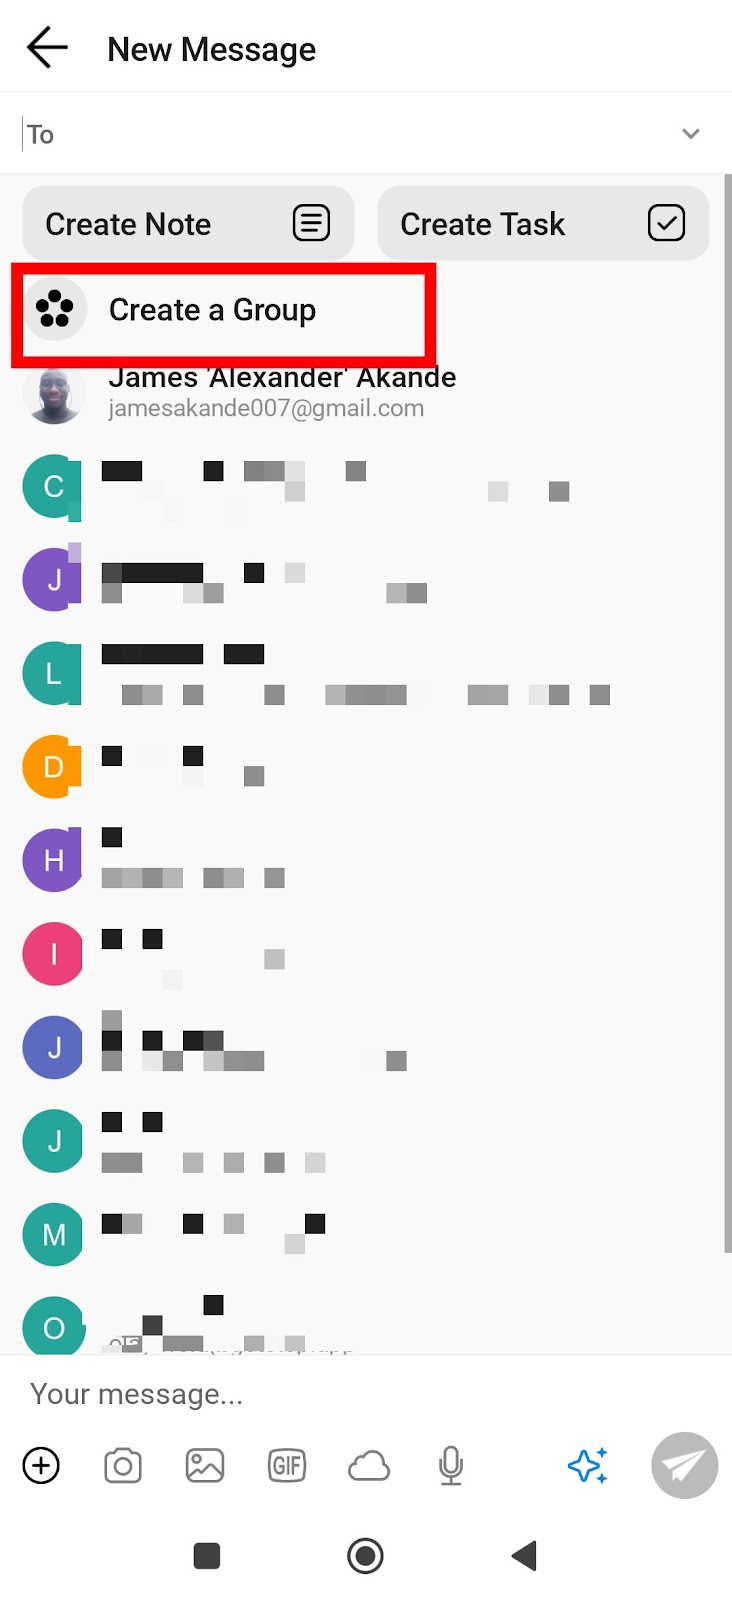
· You can also click on the group icon in the bottom menu to create a group
Connecting your calendar to Spike
Spike’s calendar syncs by default to the default Google calendar for your mobile phone and email account, once permissions are allowed.
You can add a new event to the calendar in the following steps:
· Tap on the clock icon in the bottom bar. This takes you to the calendar section.
· Tap the blue plus button in the middle of the bottom bar to create a new event.
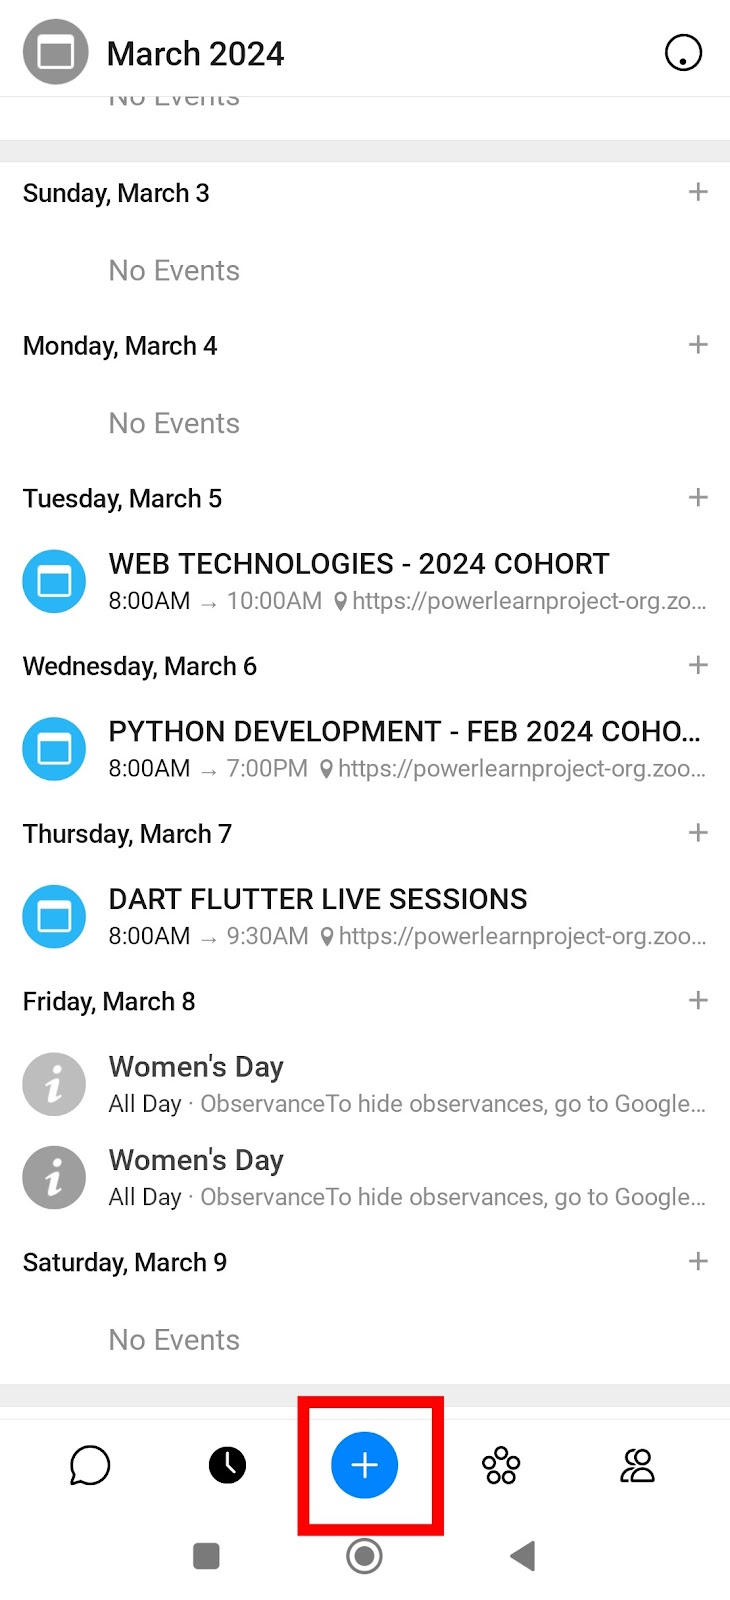
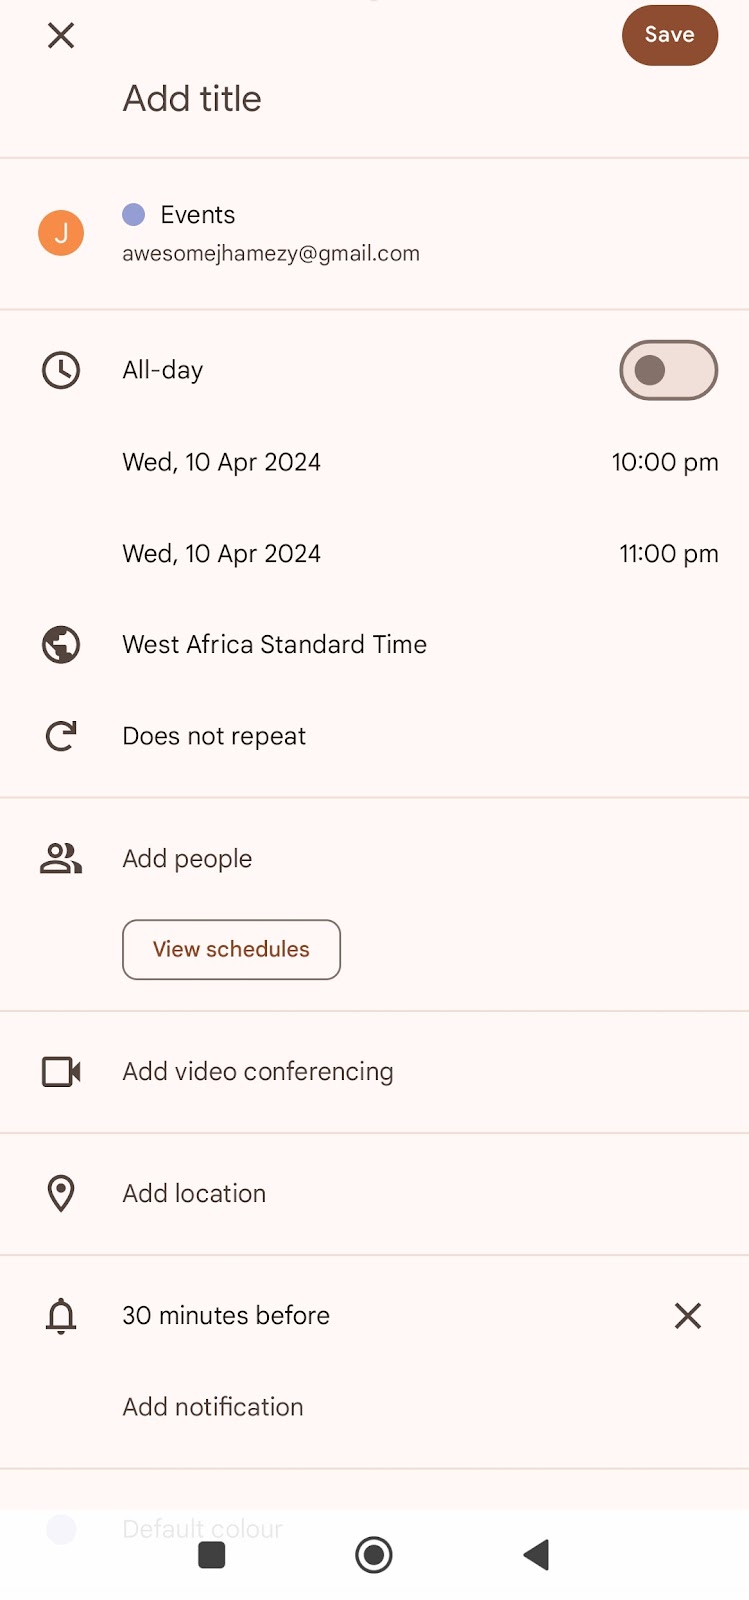
· You will be directed to the add events section associated with your default calendar (usually Google Calendar)
Notes and Tasks
Spike also has inbuilt productivity features like Notes and Tasks to help you on the go; creating a digital workspace without having to leave the app.
There are two ways you can access the Notes or Tasks features;
· By swiping right to open the sidebar (see Sidebar section) and selecting either Notes or Tasks.
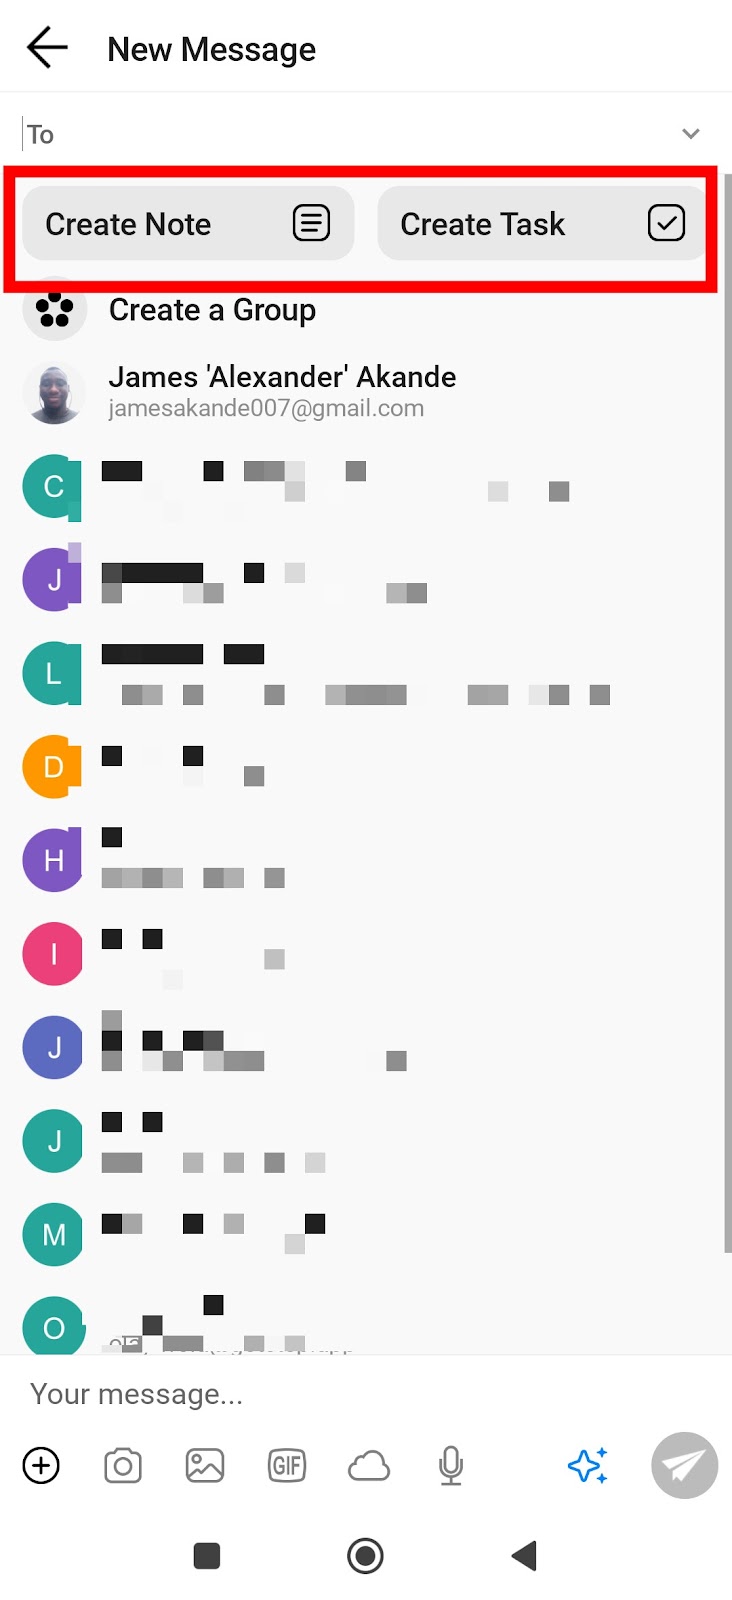
· By tapping the blue pencil icon on the home screen and selecting Create Note or Create Task in the New Message section.
Both the Notes and the Tasks sections have options for easy formatting, attachment, and Magic Message options.
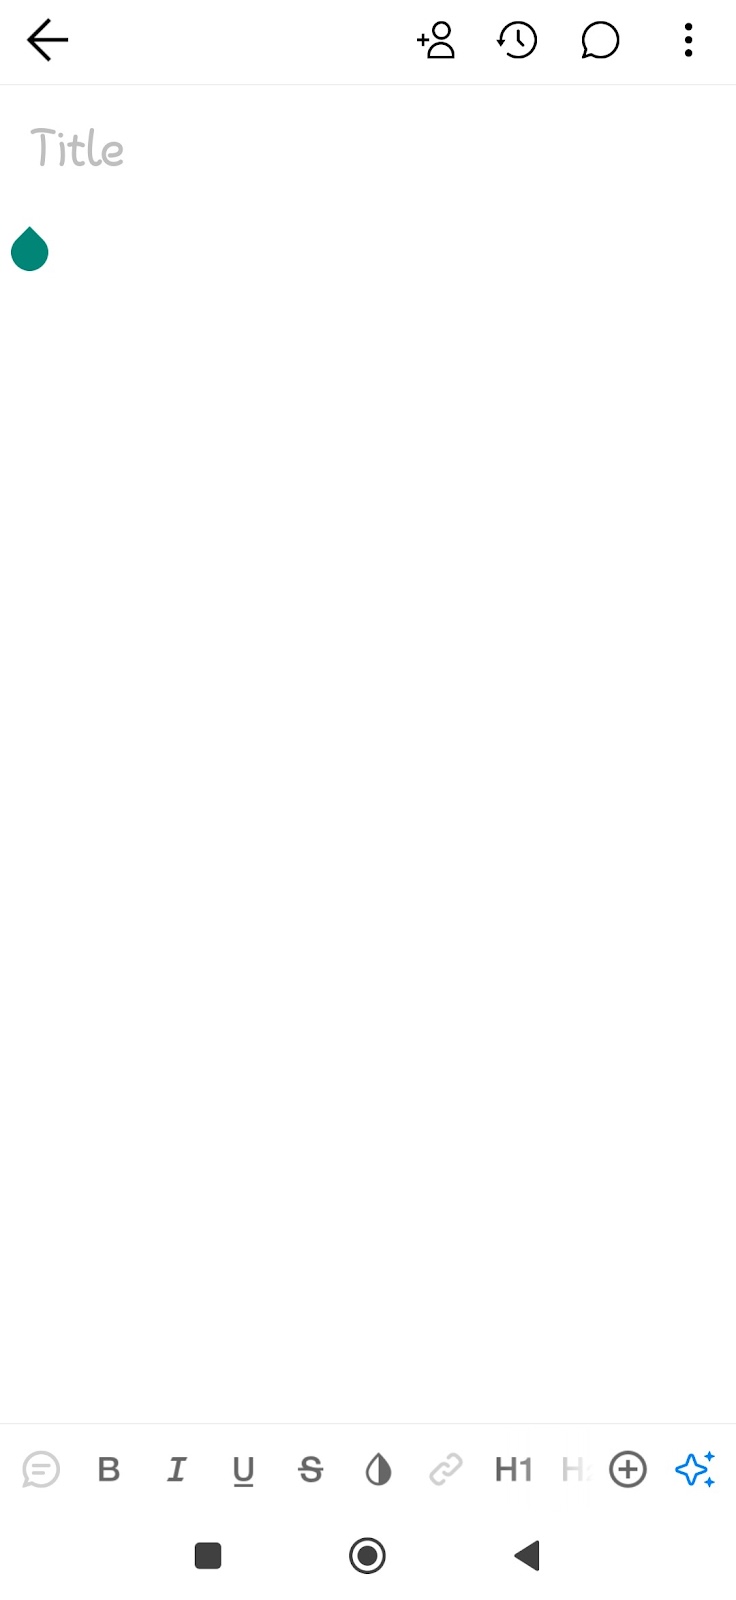
Notes section
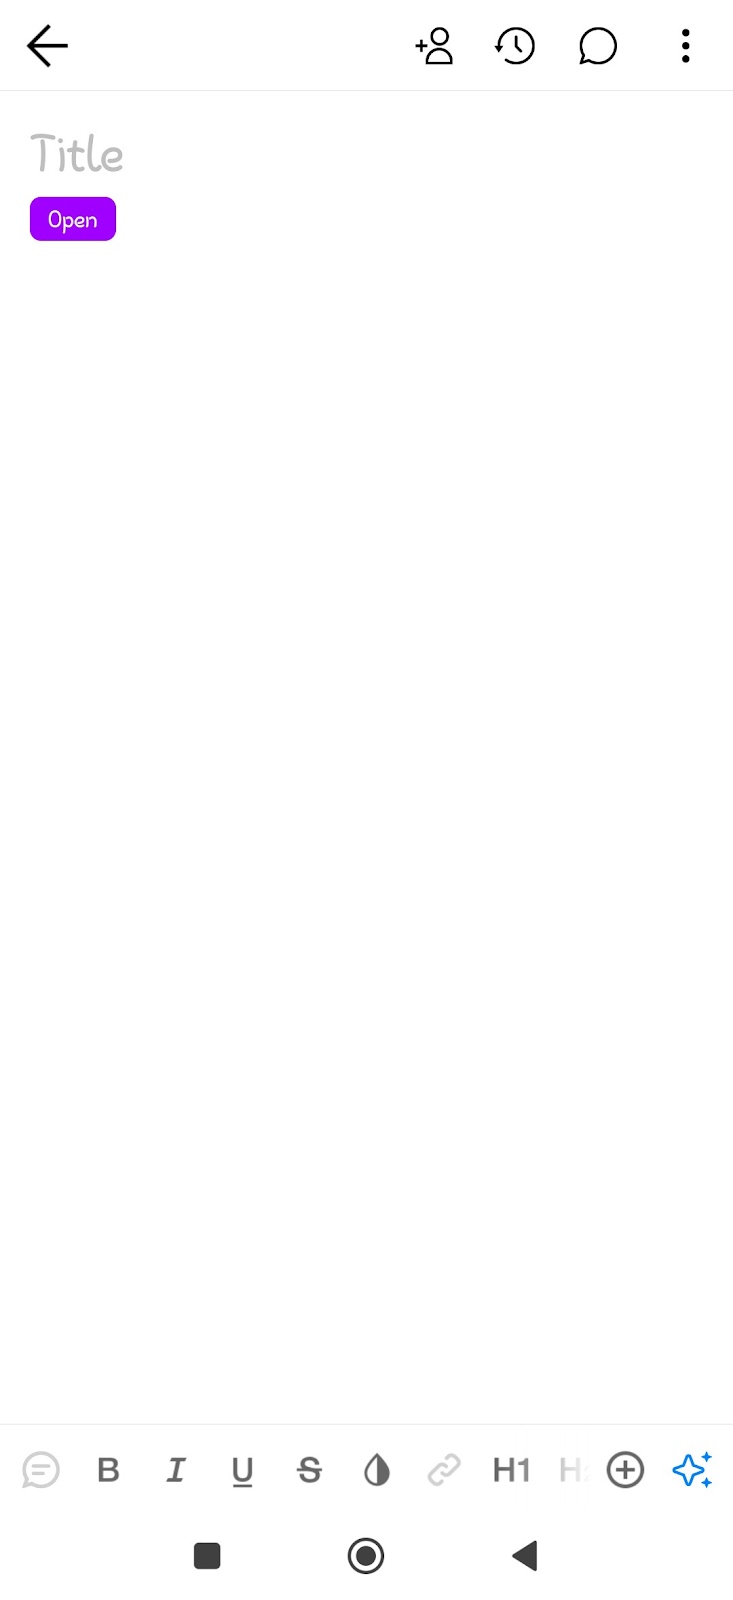
Tasks section
Adding another account
You can easily add another email account to Spike
· On the Spike home screen, swipe right to access the sidebar, and tap on Add Account

· Enter your email in the Email Address box, and tap Continue

Note: This feature is only available to users with upgraded plans.
Settings and Customization
Spike offers several customization features which can be easily accessed via the Settings option in the sidebar.
In the sidebar, you can access the Settings option by tapping the gear icon in the top right, or the Settings section in the sidebar menu.
Here, you can customize several features in sections:
· Conversation arrangement, which organizes your emails by Inbox, Subject, or **People (**see Conversational Modes in Spike)
· Messaging, which allows you to adjust priority messages, set quick swipe actions, and quick messages
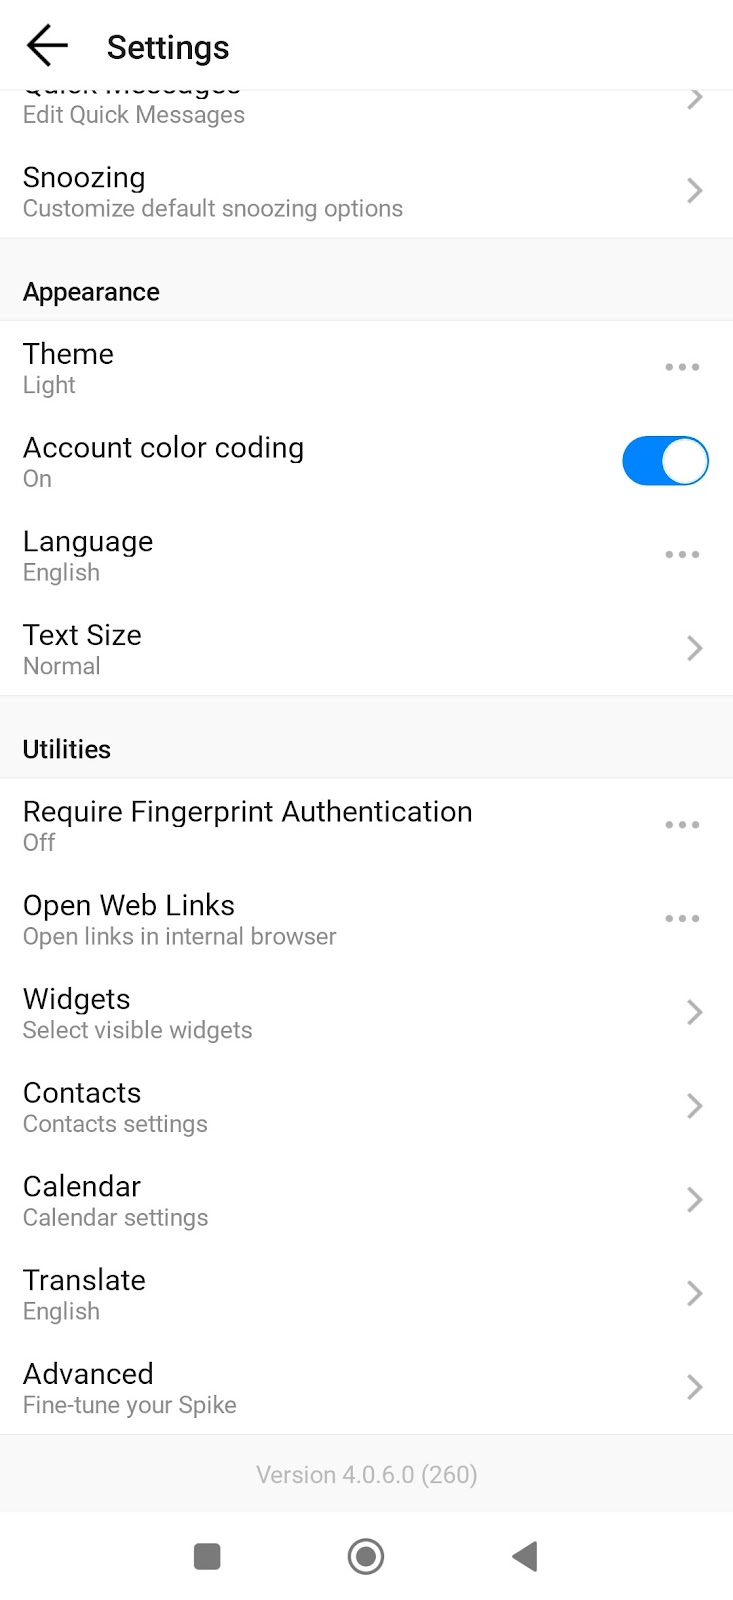
· Appearance, where you can choose the theme, enable colour coding for different email accounts, and change language and text size.
· Utilities, where you can:
o Enable or disable fingerprint authentication,
o Choose to open web links internally or externally,
o Choose which widgets to make visible
o Select contacts associated with your email accounts
o Change calendar settings, enable translate features,
o Adjust other features in the Advanced section.
Conclusion
Spike is a powerful email app that offers a fresh, modern, conversational approach to managing your email and workflow. Its unique features and functionality make it an excellent choice for anyone looking to dramatically improve their email experience in a way that is incredibly simple, efficient, stress-free, and fun.
By following this guide, you'll be able to set up your account, send messages, create notes and tasks, manage your calendar, and explore other cool features. Have a blast – I hope you love it as much as I do!